Tuesday, June 11, 2019

Amped wireless status lights


There are many Amped users who do not know about the status LED lights that they find at the front of the Amped devices. When you have Amped wifi extender device, you will find some status lights at your device. All Amped wifi extender devices have almost same status LED lights. Setup wizard for amped ac-1300 extender devices.
http setup ampedwireless com
Using 192.168.3.1amped wireless setup page you can easily change access the status light settings for Amped devices or you can also call Amped support team for help when you get problems with your devices.
LED Indicators of Amped Wireless Devices
1.     When you first provide power supply to Amped wifi extender device, you will need to have a look at the power LED of your device. When power LED is green in color that means your device is having accurate power supply.
2.     There is a LAN port at the back or bottom side of your Amped wifi extender device. When you connect any wired device to your Amped wifi extender device, “Wired Port LED” will blink in a high speed. If your port LED is not indicating even if device is connected then you have to reconnect your device once again. 
amped wireless sr10000
These are two main status LED indicators that you will find with Amped wifi extender device that you are using. When you can’t get with these Amped wifi extender devices then you can access 192.168.3.1 amped wireless setup page and then you can resolve your light problems.
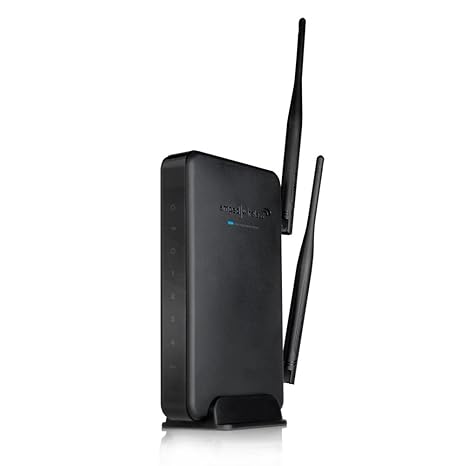
There are some other hardware options that you will find at Amped wifi extender device. There are 2 antennas that you will find with your wifi extender device. These antennas will help you to get wifi connections with a long range. Make sure that you are connecting your device accurately when you setup your device for first time.

Setting up the MTU Settings


tplink wifi router devices will transfer data packets with a default size and you can change the data packet size easily using http 192.168 o 0.1 tp link web page. When you change the data packet size you will find that data speed is changed for your tplink device. if you increase the data packet size then data transfer speed will be a little bit slow and when data packet size is lower than default, your device  can send data in higher speed. SSID is changed after firmware updates
http //www.tplinkwifi.net
How to Change MTU Size for TP-Link Router Devices?
1.     Access tplink router login page from your computer that is connected to tplink router.
2.     Fill http 192.168 o 0.1 tp link to the address bar and then fill tplink router login user name and password.
3.     Click on “Network” button.
4.     After that select “WAN” option.
5.     At the end click on “MTU” button.
6.     Select your wifi router connection type. When you are choosing the connection type, make sure that you can get these details from tplink team.
7.     Change the MTU or data packet size for your tplink wifi router device.
8.     Specify the primary and secondary DNS details for tplink wifi router device installed to your network. 
whatis-tp-link.com
9.     If you want, you can change the MTU size from tplink tether application. Same steps can be used for tplink tether application.
10.                        Click on “Apply” button and save settings.
When you are changing the MTU settings for your tplink wifi router device, you are actually changing the fragmentation settings for your routers. Fragmentation process will destruct the data packets in small packets and then reconstruct these packets once again at the end point. You can change these settings for your device any time you want.
    

Sunday, June 9, 2019

Updating the firmware for tp link router


Updating firmware for tp link router is very simple and fast which can be performed easily. Before updating the firmware keep in mind that some models have multiple hardware versions when upgrading use only firmware for the same hardware version.
Here are steps to be used for updating the firmware for tp link routers
1. Download the latest version of the firmware. Go to download center select the firmware version according to hardware version of the router device model.
tp link powerline setup
2. Extract the zip file from the download.Tp-link router firmware using inline utility.
3. Log in to TP-link router management profile by clicking on website HTTP//tplinkwifi.net
4. Click on the option showing firmware upgrade and click on browse file to find the extracted firmware file and open it by click on open it.
5. After clicking on the upgrade button device will be reboot automatically after finishing the up gradation of the firmware.
6. To check and verify the status either the firmware updated or not we have to click on status. It will show the status of the firmware.
7. Sometimes after updating the firmware, they restore the router's settings to factory reset. In this case, we have to run the Quick setup wizard to reconfigure tp link router.
Image result for tp link
Read the instructions carefully Http //tplinkwifi.net
We have to take care of some of the precautions while updating the firmware of routers in the systems. Which are as followed
1. Never upgrade the firmware on the wireless connection
2. While upgrading the firmware does not shut down the system. Make sure the power backup plan for the same.
3. Internet cable should not be a disconnect from the system while updating the firmware of the router.
4. Pay attention to notes of downloaded firmware. Some time new firmware does not support the backup file of older versions of firmware. If we have found the situation then we have to reconfigure the router manually.

Thursday, June 6, 2019

Configure D-Link Access Point using WPS


Dlink access point devices, as name suggest are used so that you can easily access wireless wifi connections for your devices. When you have any dlink access point device, you can add this device to your home network simply by pressing WPS button from your access point device and your wifi extender device. When you do not need to use WPS configurations, you can also login http //dlinkap.local and configure your device setup using manual method. When you choose manual method, you will need to follow all steps from your computer screen. 
dlinkap dap 1360 setup

Complete Steps for WPS Configurations for Dlink Access Point  
1.     You can place your new dlink device near to any power plug and switch ON the power supply.
2.     After that you can press WPS button from your router device.
3.     After few seconds press WPS button from dlink access point you are using.
4.     If WPS is successful for your devices, WPS status LED will change it’s color and blink very fast.
5.     If WPS steps are not successful then you can follow these steps again and again.
Once your dlink access point device and your access point device compatible to each other, you can place your new access point to a location where you need more high speed wifi connections. 
mydlink cloud camera login
Once your devices are connected to each other, you can access http //dlinkap.local from a computer device. You can then update your device very easily. Some users also feel difficulty with WPS setup for those users we will suggest manual configurations are best. Manual setup is also very easy for these devices but for that you will need setup CD that you will get with each new device. Recover lost admin password for your d-link   

Sunday, June 2, 2019

Log In to Netgear WN2000RPT wifi extender


There are many Netgear wifi extender devices that are available for you and when you need to get advance wifi extender then you can get Netgear WN2000RPT wifi extender devices for your network. When you get this wifi extender device and see these extender devices carefully, you will find some hardware features of these devices.
Netgear_ext setup


At the front side you will find some status LED lights of your devices and these lights will have different meanings. There is a WPS button that is used so that you can easily add these wifi extender devices to your network. Also, at the back end of mywifiext net setup wizard device you will find other hardware options. When you need to reset your Netgear WN2000RPT wifi extender device, you will find the reset button from the back side of your device.

Each kind of settings for your Netgear WN2000RPT wifi extender will be possible if you can access login page of your device. When you connect your wifi extender device to your network, you will able to make your device login.

How to Make Login for Netgear WN2000RPT wifi extender Device?

Once you decide that you need to access setup page of your device, here are steps that you will follow.

1.     You will need a computer device with wifi connections so first you can connect your Netgear WN2000RPT wifi extender to computer device. Get information on the netgear wifi extender device settings with WPS button.
Netgear extender login

2.     After that fill mywifiext net setup wizard address and get the wifi extender login page. There are two addresses that you can use to access your wifi extender login page. You can fill http:// mywifiext.net or http:// 192.168.250.1 IP address for accessing your device’s login page.
3.     Fill Netgear wifi extender login page and address and then get the access for your device setup page.
These are steps that will allow you to access setup page for Netgear WN2000RPT wifi extender device.